

Are you an influencer, business, professional photographer, or just a frequent Instagram user who likes to post top-tier content to your followers? Then you need to know how you post content from your computer. By doing this, you can continue (or start) to provide your followers with high-quality and engaging content on time that they will only crave more of.
Posting the highest quality content is one good way of attracting and securing more engagement from your followers. However, you can also get your Instagram career started if you buy likes by using services to boost your Instagram profile.
Even though catching people’s attention on Instagram can be challenging at first, it is incredibly beneficial to ensure that your content’s quality is always consistent and up to scratch. So, if you are looking to step up your Instagram game by uploading only the best quality images or videos, keep on reading to learn how to upload content on Instagram from your computer or laptop.
Getting started
You have probably already scouted Instagram for the upload button on your browser without any luck. This is because you have to use third-party software such as Hootsuite, Buffer, Hopper HQ, and others for the job.
While they do provide you with fantastic opportunities to create a constant flow of posts for your Instagram or SoMe account, you would need to choose a tool that you fancy and go ahead with a trial or create an account with a paid subscription to get started.
We will go ahead with introducing you to Hopper HQ, a tool that allows you to manage and schedule all your Instagram posts with ease.
Set up an account
To get started on Hopper HQ, you need to sign up. You can take advantage of their 14-day free trial or start a subscription to enjoy all of the tools they provide that could benefit your Instagram account.
Once signed in
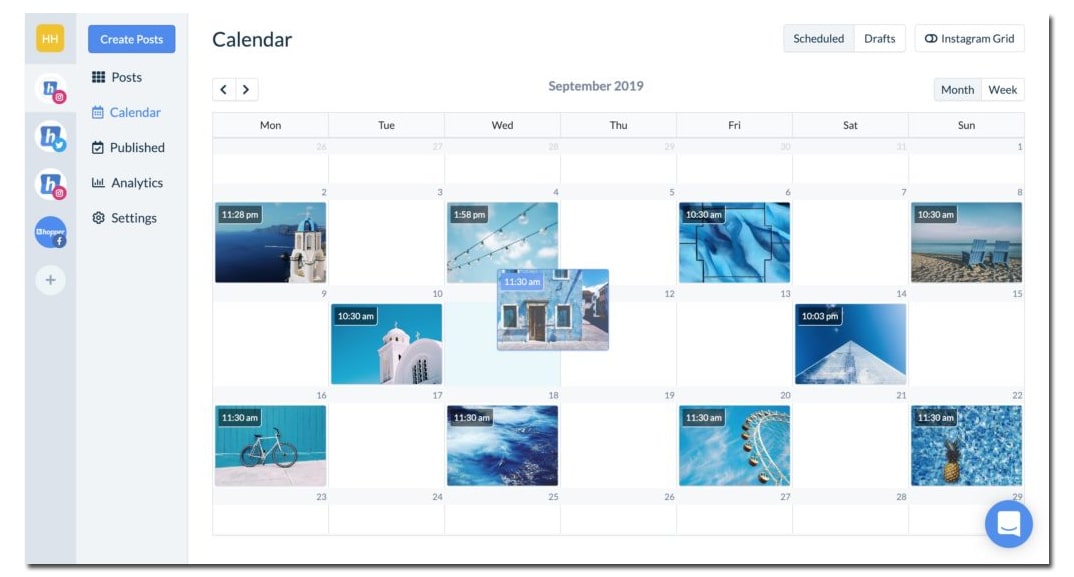
When you have managed to open an account successfully, you will see your dashboard when you log in. On your dashboard, you can see the posts you have scheduled for positing. You also have a grid planner available, which allows you to see how your scheduled posts will look on your Instagram profile before they are posted.
Create and schedule posts
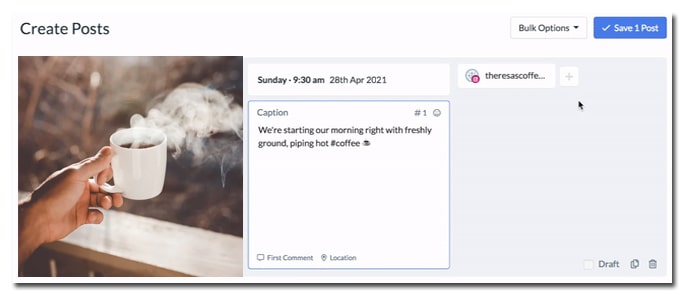
To create and schedule photos and videos to Instagram through your laptop or computer, you start by clicking “Create Posts” on the blue button, which is located at the top left. This function allows you to bulk-upload up to 50 pictures and videos at a time from your device or online cloud systems such as Google Drive and Dropbox, among others. Once uploaded, you can easily write captions and hashtags to all of your posts, allowing you to keep your account neat and organized.

Preparing the posts #1
If you have uploaded pictures and videos onto Hopper HQ, you may be advised to go to the in-system photo editor to crop your images to the correct size that Instagram supports. Instagram has allowed users more freedom to upload images and videos in different dimensions. However, if you are a business, it is essential to keep your profile neat and professional. So, try and stick to the same dimensions for all of your posts. Currently, Instagram supports images and videos of sizes ranging from 320px to 1980px.
Preparing the posts #2
Once all of the posts are prepared and ready to be posted, you have the option to either click “Post Now” or schedule when each post should be released on Instagram (and other Social Media accounts associated with the Instagram account). If you are collaborating with more people, you also have the option to save the posts as a draft.
Ready to post
Having gone through the steps above, you should now be able to see your dashboard with all the stunning pictures you’re about to post automatically scheduled to your preference – a huge time saver for the busy account manager.
To summarize
Making use of a tool such as Hopper HQ is a great way to step up your Insta-game, as it allows the busy influencer or business to prepare and post engaging content at all times. Besides, you will also receive useful analytics to see what people are engaging with your account and what they would like more of.
This is a Contributor Post. Opinions expressed here are opinions of the Contributor. Influencive does not endorse or review brands mentioned; does not and cannot investigate relationships with brands, products, and people mentioned and is up to the Contributor to disclose. Contributors, amongst other accounts and articles may be professional fee-based.